Article contains Affiliate links and a discount code for MOVE Bumpers. Discount Code – JESSE_JGA
MOVE Bumpers, who are they?
Move bumpers is a brand of DIY bumpers that are manufactured in Lewiston Montana. They offer pre made kits so that someone who has the ability can put their own bumper together at a fraction of the price.
Why do I want one? (or multiple)
Well if you follow my content, you probably understand that on most things I’m really trying to find the best bang for the buck and I’m more than willing to take on a big project. This makes move bumpers perfect for me. I have been “welding” (not professionally) since I was pretty young, starting as a kid on the farm with my father’s arc welder. As I got older I picked up MIG and TIG welding. I am capable of doing just about any of them, but I really just stick to MIG and TIG these days. The MOVE kits are generally a huge cost savings if you.
What do I want?
I was interested in a bumper that had some classic styling, while was fairly low profile so that when i off road it didn’t get hung up on everything. I also required something that came up over the headlights protecting from any wildlife that may run out into my way since I use the Suburban to hunt with. I would like for a bumper to have an integrated winch mount.
What I Went With
I chose the Move Heritage bumper with the grille guard. This ticked every box with the exception of the winch mount. This wasn’t that challenging to overcome, as the MOVE bumper is a complete diy setup, so you can change just about anything you’d like on the bumper. I picked the MORE square body winch mount, which was more trouble than the bumper was to make work. [The videos on this are linked here (Part 1) (Part 2)]
Fabrication Time
The overall construction of this bumper is not extremely challenging. If you’re taking this on yourself, my best advice is to just take it slow, clean your material, make sure everything is square, and tack it all together. Step back, and make sure everything is exactly how you want it before you do the final burn in’s.
You start with disconnecting the battery, this step should NOT be overlooked, especially if you have a more modern vehicle, that has an ECM (Engine Control Module) or PCM (Powertrain Control Module). You do not want the possibility of damaging the electronics on your vehicle.
Next with you want to start by bolting the bumper mounts to the frame. I personally recommend placing some very small shims, or something between the brackets and the frame, this will ensure that if/when things move around while doing your final welding, you’ll be able to put it back on. It will also help for powder coating or paint being able to slide past the frame.
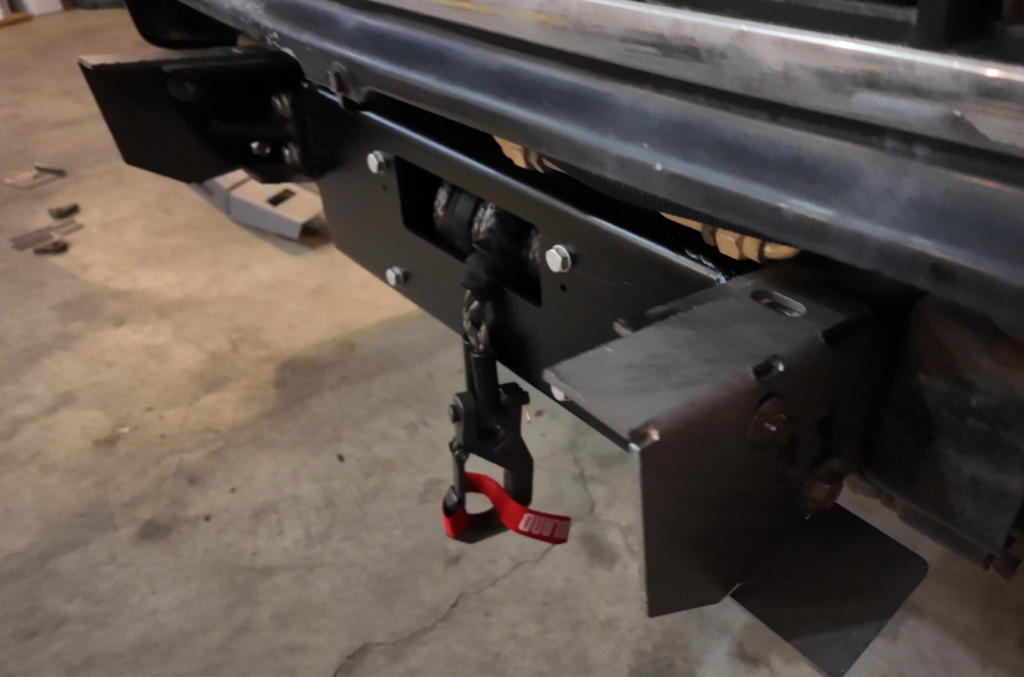
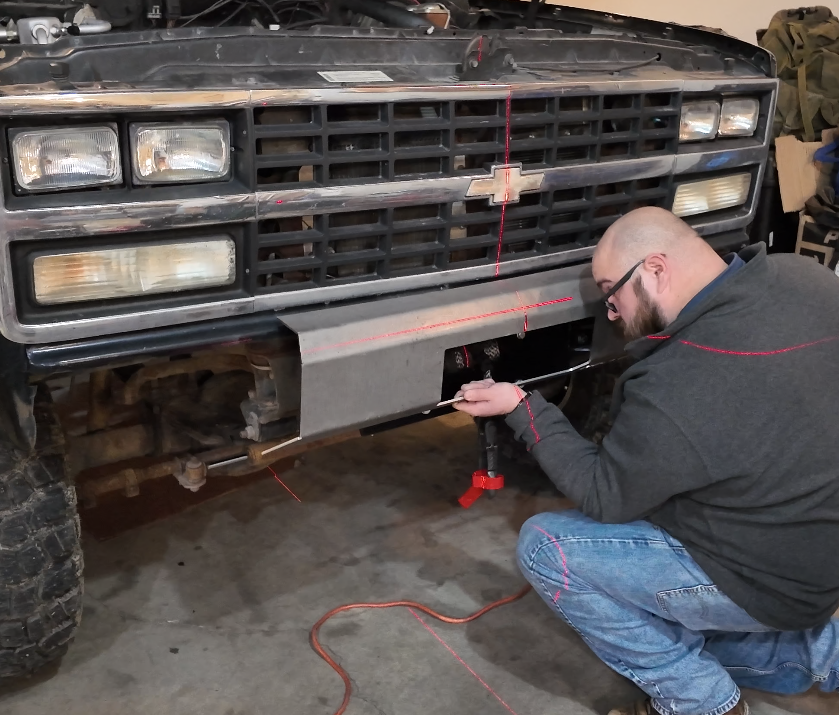
Once your brackets are mounted, you want to find the center of the truck and bumper, and mark them both. I recommend then taking a laser level and lining it up with the center of the truck. With a friend or a jack and some blocks of wood, place the main body of the bumper on the brackets where you want it, and tack weld it in place. You next want to add the side “wings” and then the side plates. Take your time and make sure all the plates line up, and everything in square.
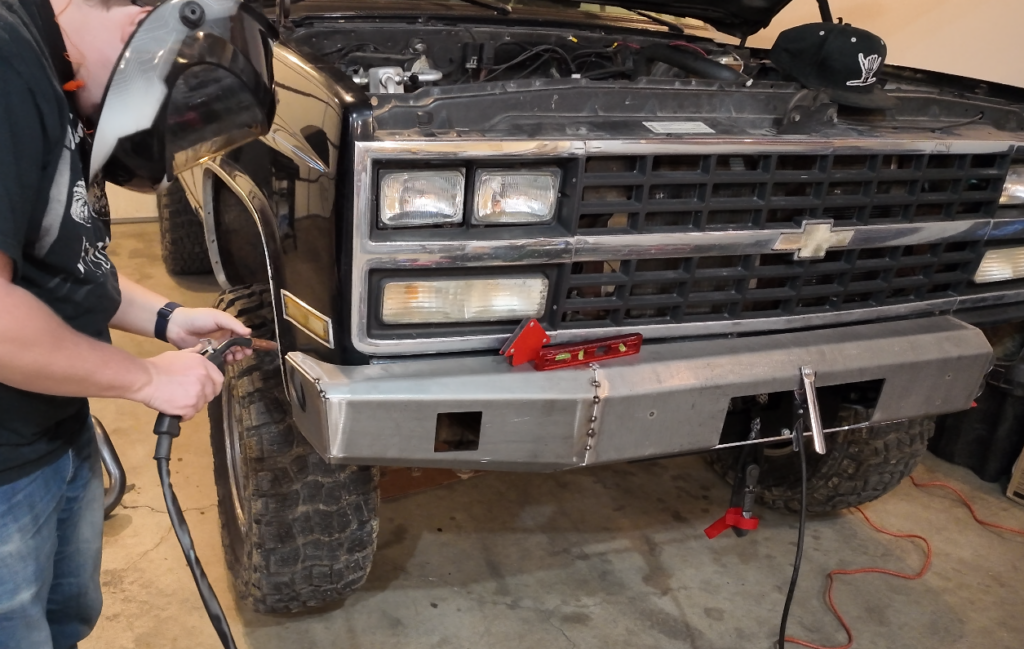
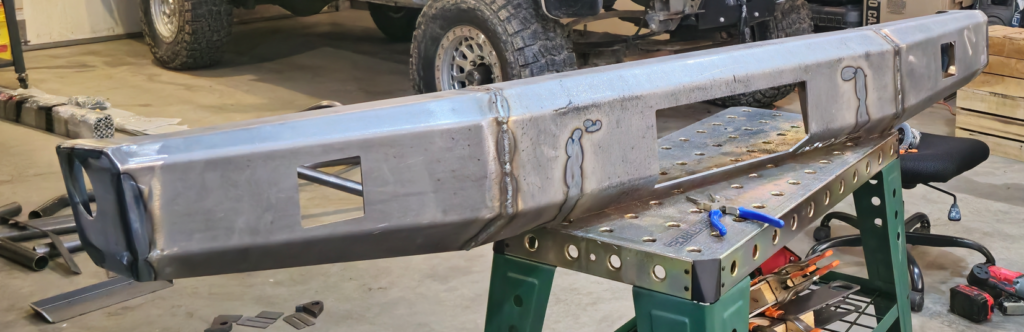
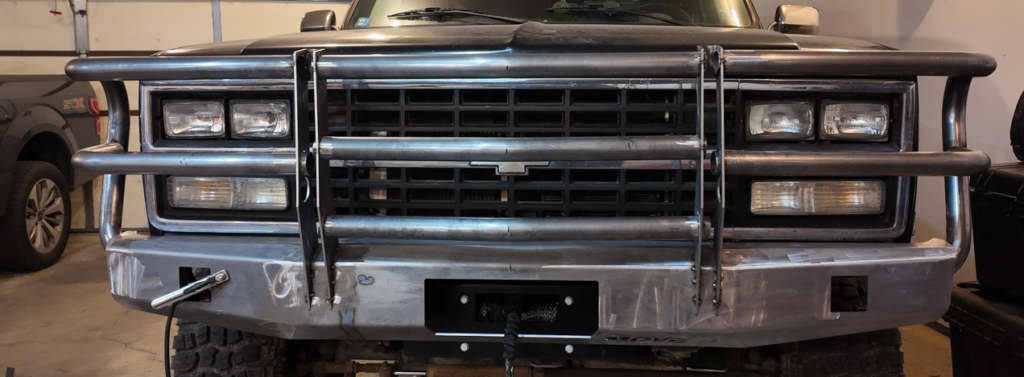
After those are all in place I chose to final weld them into place. I did this because once you install the grille guard bars, you won’t be able to grind those welds down to shape them how you want. So once I got done welding everything together, I took my flap discs (starting with a 40 grit) and smoothed the welds out, and shaped the corners of the bumper (used 120 to not leave deep groves and leave a sharp edge)
Once the main body of the bumper is finished, you can move onto the grille guard, which in my case took a lot longer than anything else. I started by trimming the bars that wrap around near the fender because they would come into contact with my fender. Once they were trimmed I was able to figure out where the vertical bars needed to be. I then placed the vertical bars (with a 2×4 clamped between the outside and inside bar) where I needed it, and tacked it into place. I just repeated the process for the drivers side.
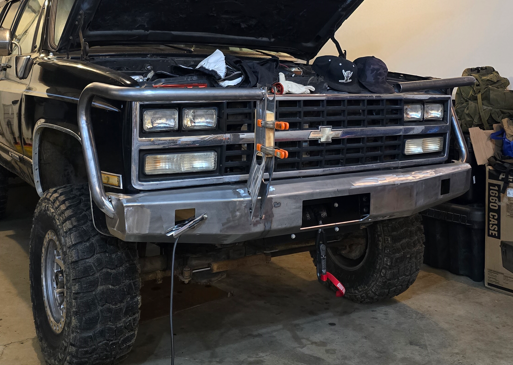
Once the side bars and vertical bars are in place I measured and marked where the center bars needed trimmed, and cut them to length. Once cut, I marked the center of them, place them where I wanted them, and tack welded them into place. The only thing left was the outside bars that go in-between the headlights and turn signals. I don’t believe all trucks required this, but with my front end they were just very obstructive to the turn signal, so I decided to relocate them.
I drilled a 2-1/4 hole 2 inches up from where the holes originally were. I then took the blanks from the new hole, and welded them, and smoothed the welds out. Once the holes were made I was able to notch the middle bars and tack weld them in.
Again I highly recommend taking a good step back and some time to really look everything over and decide if everything is where you want it, because at this time you’re close to the point of no return. Once you decide everything is ready, it’s time to start welding for the final assembly. Firm up some of the tack welds, remove the bumper and start going over all of the joints of the bumper. Take your time, grind and smooth your welds down, and soon you have a close to finished bumper. The last step is to install the bars that cover the vertical sections of the bumper. Grind those welds down and you have a completed bumper.
Prep time
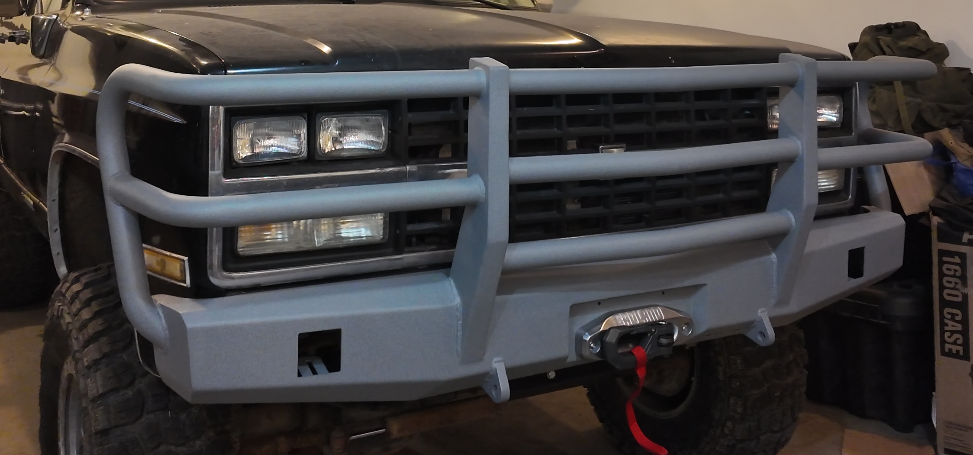
Once you’re done welding, you’re ready to prep the bumper for whatever coating you choose. I personally wire wheeled everything, then took a DA sander at 120 grit and went over the entire bumper. I used emery cloth and sand paper on places I couldn’t reach with the DA sander. I had a local shop powder coat my bumper in “Mock Rock” it’s a very interesting color, and I really like it a lot.
Wrap Up
I LOVE this bumper! I don’t think there’s anything that even comes close to the price point, and gives you the satisfaction of building the bumper yourself. This in reality can be done relatively inexpensively. I personally used a Yes Welder YWM-160 MIG welder, and a Harbor Freight angle grinder, this is similar. I also used Benchmark Abrasive 40 Grit Flap Discs and 120 Grit Flap Discs.
Overall I HIGLY recommend this bumper if you are up for the challenge!
Once again, please use my affiliate links if you’re interested in getting one of your own, and use my discount code to save some money on yours!
MOVE Bumpers – Coupon code JESSE_JGA
No responses yet